OK, let’s dive right into the Import and Export Wizard. If you’re on Vista or Windows 7, hit start, then begin typing “Import and Export Data” It should find it for you pretty quickly. If you’re not on one of those two, look for your SQL 2005 or 2008 folder, and search in those folders for the Import and Export Wizard, if you’re on a 64-bit OS, you’ll have two options, one 32-bit, the other 64 bit. I’m using the Import and Export Wizard for SQL 2008, so if my screen caps look a little different, don’t be too worried. All this should work on any version.

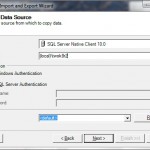
Once you start up the program you should get a screen that looks like the image on the right. For the example we’re going to run through, please download this file, and save it to your machine. It’s a CSV file with a list of first middle and last names.
Also, open SSMS, connect to your instance of SQL Server and create the following table:
CREATE TABLE example (
     firstName VARCHAR(255)
   , middleName VARCHAR(255)
   , lastName VARCHAR(255) )
This is the destination table we’re going to use. I’m putting this table in my AdventureWorks2008R2 Database, if you need a copy, click here.

We’re going to load a simple csv file to a SQL Server 2008 table. Please click next, to continue.
In this screen, you’re going to select your source. For our example, please select “Flat File Source” in the first box. This will cause the wizard to change the layout on the page. You’ll see new options to browse for your file. Click “Browse”, and select the file you downloaded earlier. In order to see the file, you’ll need to change the file type to CSV. Once you’ve selected the file, names.csv the only other option you’ll need to change is mark the check box beside next to “Column names in the first data row.” That way, it will read the header information for you.

Your wizard should know look something like the image to the right.
Now we have to define the destination. In our example we want to load this data to the table we defined above. In my example, I’m connecting to my 2008R2 instance, and all I have to change is the database name.

Your connection should look like the image to the left.
After you choose your database, click next to continue. You should now be prompted to select the table name. Click on the entry that under “Destination” and choose dbo.example. Since we’ve named the columns in the source csv the same as the the destination table, we don’t need to mess with the Edit Mappings button.
You could press the preview button to verify the mapping works, or you can simply press next to continue.
You’re finished. Before we carry on, go ahead and check off the Save SSIS Package to your hard drive. That way you can open the package in BIDS and check out the inner workings of the package you just created. I’ve uploaded my copy here if you need to grab a copy. Once you’ve run your package, connect to your instance of SQL and check out the results.
SELECT * FROM dbo.example
You should see an exact copy of the csv in your table.
This may not seem like a huge step, but you’ve now created a simple SSIS package. The steps you’ve taken are the basis of every ETL you can imagine. When we come back to SSIS packages, I’ll show you how “you’ve just taken your first step into a larger world.”
If you have any questions, send them in! I’m here to help!