Recently a client mentioned he wanted to run spark in a container for testing Databricks code locally. He Was working from the basic docker-compose yaml file provided by bitnami. That way, the containers would run on his local machine. The problem was accessing the cluster from the host machine. I decided to take a day to get it running on my setup.
The starting yaml
This is where I began.
services:
  spark:
    image: docker.io/bitnami/spark:3.3
    environment:
      - SPARK_MODE=master
      - SPARK_RPC_AUTHENTICATION_ENABLED=no
      - SPARK_RPC_ENCRYPTION_ENABLED=no
      - SPARK_LOCAL_STORAGE_ENCRYPTION_ENABLED=no
      - SPARK_SSL_ENABLED=no
    ports:
      - '8080:8080'
  spark-worker:
    image: docker.io/bitnami/spark:3.3
    environment:
      - SPARK_MODE=worker
      - SPARK_MASTER_URL=spark://spark:7077
      - SPARK_WORKER_MEMORY=1G
      - SPARK_WORKER_CORES=1
      - SPARK_RPC_AUTHENTICATION_ENABLED=no
      - SPARK_RPC_ENCRYPTION_ENABLED=no
      - SPARK_LOCAL_STORAGE_ENCRYPTION_ENABLED=no
      - SPARK_SSL_ENABLED=no
The SPARK_RPC_AUTHENTICATION_ENABLED, SPARK_RPC_ENCRYPTION_ENABLED, SPARK_LOCAL_STORAGE_ENCRYPTION_ENABLED, and SPARK_SSL_ENABLED environment variables were being set to default values. So I got rid of them. The same was true for SPARK_RPC_AUTHENTICATION_ENABLED, SPARK_RPC_ENCRYPTION_ENABLED, SPARK_LOCAL_STORAGE_ENCRYPTION_ENABLED, and SPARK_SSL_ENABLED.
Adding my services network
In my environment, I have a VNET set aside for all the services running in my lab. This subnet hosts my SQL instances, Web Application Proxy, and websites. I also set up a docker macvlan network so any containers I attach to that network appear on my services VLAN. After setting it up, all I have to do is include the following in the header of my docker-compose yaml files.
networks:
  default:
    external: true
    name: services
Then, I can add a dns, dns)search, domainname, networks, and ports section to any containers I want to expose on my services VLAN.
So now, my spark and spark-worker look like the following.
services:
  spark:
    dns:
      - 192.168.252.5

    dns_search:
      - 138corban.toyboxcreations.net

    domainname: 138corban.toyboxcreations.net
    environment:
      - SPARK_MODE=master

    image: docker.io/bitnami/spark:3.3.2
    networks:
      default:
        ipv4_address: ${SPARK_MASTER_IPV4_ADDRESS}
    ports:
      - '8080:8080'
      - '8081:8081'
      - '7077:7077'

  spark-worker:
    dns:
      - 192.168.252.5

    dns_search:
      - 138corban.toyboxcreations.net

    domainname: 138corban.toyboxcreations.net
    environment:
      - SPARK_MODE=worker
      - SPARK_WORKER_MEMORY=4G
      - SPARK_WORKER_CORES=2

    image: docker.io/bitnami/spark:3.3.2
    networks:
      default:

    restart: unless-stopped
In this case, I made the IP address for my master node a variable, SPARK_MASTER_IPV4_ADDRESS so I could pass it in during creation. For the worker, I set it to DHCP as an address. Since I have a local DNS server running, I want to set the master to use a CNAME record rather than having to memorize an IP address. So I’ll set a container_name and an environment variable for my driver node and worker node to keep track of the new name.
services:
  spark:
    container_name: spark-master-01
    dns:
      - 192.168.252.5

    dns_search:
      - 138corban.toyboxcreations.net

    domainname: 138corban.toyboxcreations.net
    environment:
      - SPARK_MODE=master
      - SPARK_MASTER_HOST=spark-master-01.138corban.toyboxcreations.net

    hostname: spark-master-01
    image: docker.io/bitnami/spark:3.3.2
    networks:
      default:
        ipv4_address: ${SPARK_MASTER_IPV4_ADDRESS}
    ports:
      - '8080:8080'
      - '8081:8081'
      - '7077:7077'

  spark-worker:
    #omit container name
    dns:
      - 192.168.252.5

    dns_search:
      - 138corban.toyboxcreations.net

    domainname: 138corban.toyboxcreations.net
    environment:
      - SPARK_MODE=worker
      - SPARK_MASTER_URL=spark://spark-master-01.138corban.toyboxcreations.net:7077
      - SPARK_WORKER_MEMORY=4G
      - SPARK_WORKER_CORES=2

    image: docker.io/bitnami/spark:3.3.2
    networks:
      default:
The final change I want to add is the command to keep the cluster running on my host until I manually stop it. That way, I don’t have to wait for it to spin up whenever needed. My final docker-compose.yaml looks like the following:
#Driver and one worker
networks:
  default:
    external: true
    name: services

services:
  spark:
    container_name: spark-master-01
    dns:
      - 192.168.252.5

    dns_search:
      - 138corban.toyboxcreations.net

    domainname: 138corban.toyboxcreations.net
    environment:
      - SPARK_MODE=master
      - SPARK_MASTER_HOST=spark-master-01.138corban.toyboxcreations.net

    hostname: spark-master-01
    image: docker.io/bitnami/spark:3.3.2
    networks:
      default:
        ipv4_address: ${SPARK_MASTER_IPV4_ADDRESS}
    ports:
      - '8080:8080'
      - '8081:8081'
      - '7077:7077'

    restart: unless-stopped

  spark-worker:
    #omit container name
    dns:
      - 192.168.252.5

    dns_search:
      - 138corban.toyboxcreations.net

    domainname: 138corban.toyboxcreations.net
    environment:
      - SPARK_MODE=worker
      - SPARK_MASTER_URL=spark://spark-master-01.138corban.toyboxcreations.net:7077
      - SPARK_WORKER_MEMORY=4G
      - SPARK_WORKER_CORES=2

    image: docker.io/bitnami/spark:3.3.2
    networks:
      default:

    restart: unless-stopped
Deploying to Portainer
Since I run Portainer to manage my containers, I can now deploy this yaml file as a stack. Go to Portainer -> stacks, and add a stack to fill in the needed details.
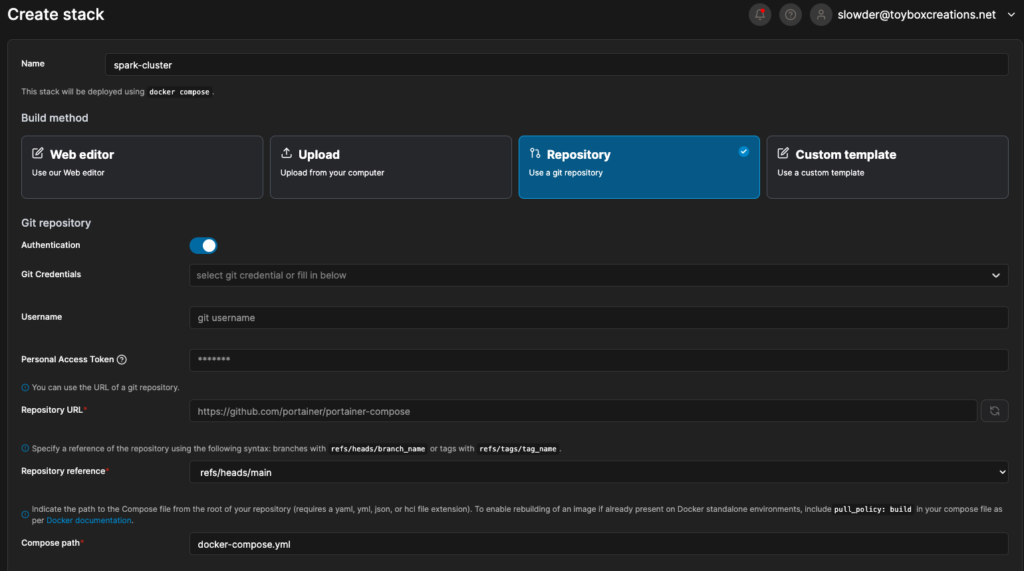
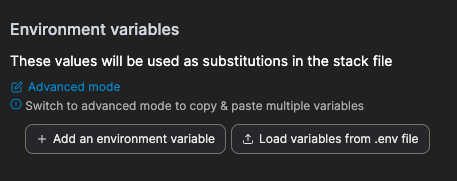
In my case, I use a git repository to save my docker files. So I select repository, my saved credentials, and then the filename I want to deploy. I can also upload an env file to fill in my variables, like SPARK_MASTER_IPV4_ADDRESS.
When I have all the details entered, I can click deploy the stack and my cluster will start up.
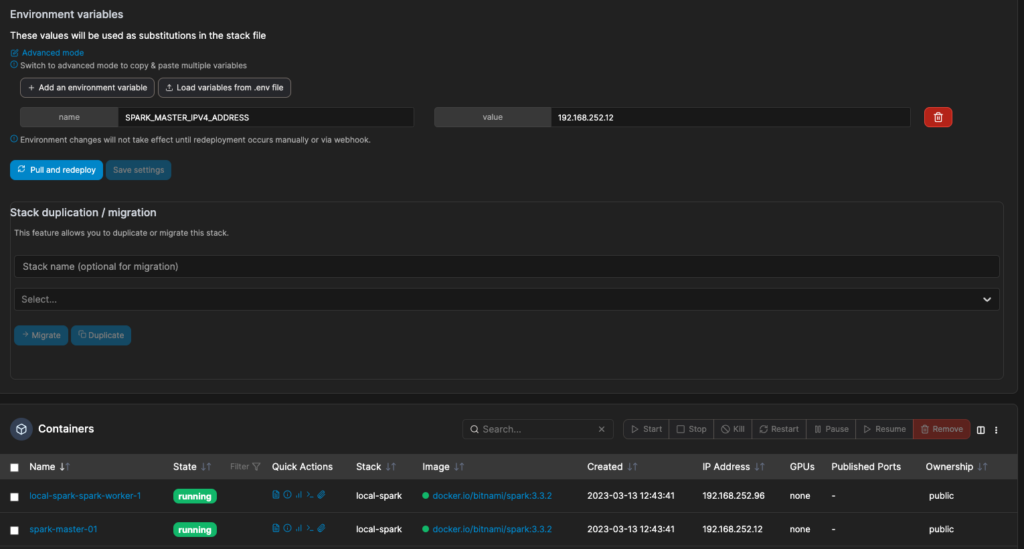
Notice the container name and IP for the worker are dynamic. Also, note that macvlan networks have their own DHCP server and will not use an external DHCP server here.
Checking on my spark cluster
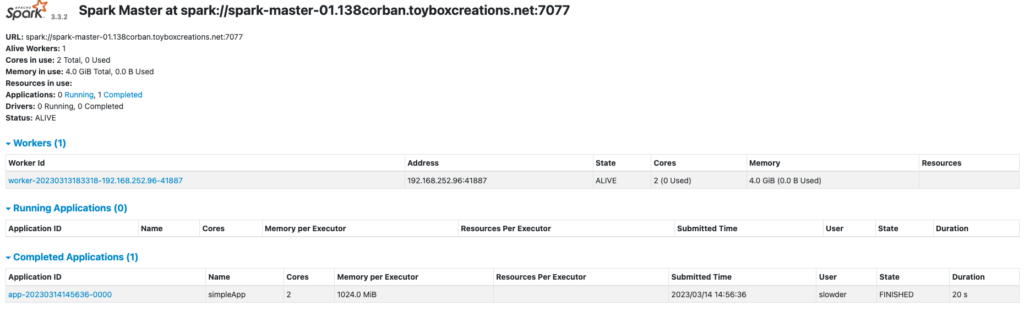
Since I used a CNAME for my master, I can open a web browser to http://spark-master-01.138corban.toyboxcreations.net:8080/
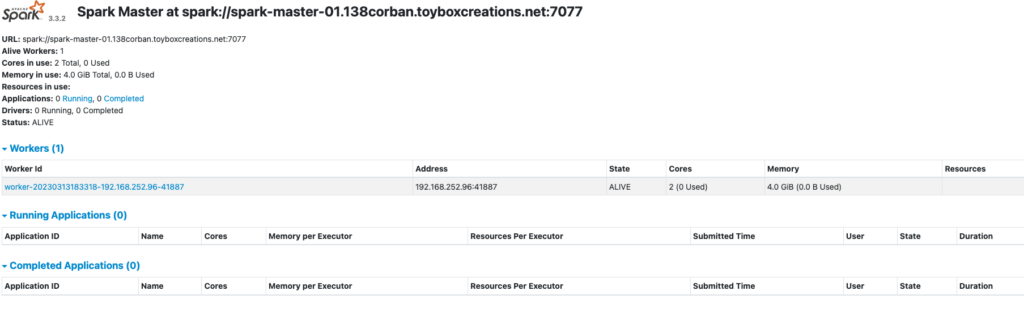
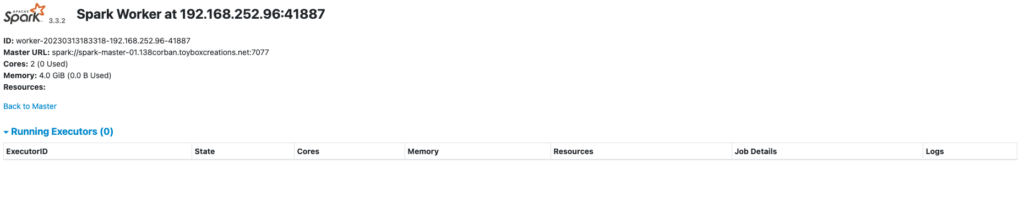
I can also open a separate tab to the IP Address listed for the worker http://192.168.252.96:8081/
Testing some pyspark
In my case, I used version 3.3.2 of the bitnami spark engine. That version of spark supports Python 3.8.16, and PySpark 3.3.2. So, to test code against this spark cluster, I had to install those versions to a virtual environment on my development machine. With those installed, I can run the following test script.
from pyspark import SparkConf
from pyspark.sql import SparkSession

conf = SparkConf()
conf.setAll(
    [
        ("spark.master", "spark://spark-master-01.138corban.toyboxcreations.net:7077"),
        ("spark.submit.deployMode", "client"),
        ("spark.app.name", 'simpleApp'),
    ]
)

spark = SparkSession.builder.config(conf=conf).getOrCreate()
sc = spark.sparkContext
data = [1, 2, 3, 4, 5]
distData = sc.parallelize(data)
result = distData.reduce(lambda f,s: str(f)+str(s))

print(result)
For my spark config, I set the master node to my master container’s CNAME record and the default port number 7077. I also set the deployMode, and app.name to make it easier to identify my code when it runs.
When I run the script above from Visual Studio Code, I see the output:

Success! Now, let’s look at my driver node again through the web browser.
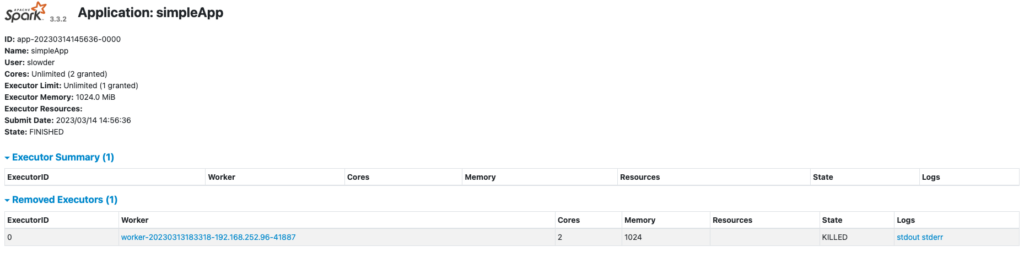
I can click on that completed application to get additional details.
And I can click through the worker details to see the following.
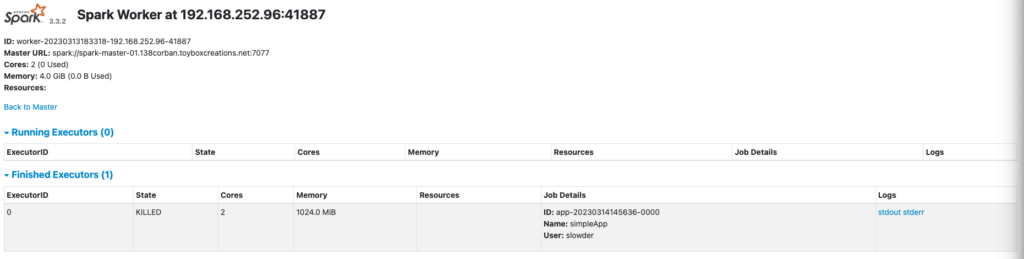
The one catch here is I cannot click the stdiout/sterr links directly. The links point to a dynamically generated hostname not registered on my internal DNS server. So I have to update each link to refer to the worker node’s IP address instead.
When I update the address, I can see the following stdout.

Conclusion
Now that I have a working spark cluster deployed to my docker host, I can do more. I could set up my worker nodes to automatically install certain libraries, just like with Databricks. In this case, I’d install delta, requests, and a few other libraries I use often. I could also wire the cluster to a repository and pull jobs from there rather than executing them remotely.
There are a few extra steps I want to take with this demo. I want to retry this docker-compose from a Windows machine. I often find Docker in Windows to be frustrating. I want to see what I must change to get things running there. I’d also like to try a version that runs locally from a Windows and Mac host. That way, I can verify local spark testing is possible too.
Until next time, if you have any questions, please let me know!