In my previous post I walked through migrating a database from SQL 2008 to SQL Azure. I briefly walked you setting up your account with SQL Azure, creating a database through the Microsoft Services website. I then covered creating tables in SQL Azure, as well as a few of the errors you may encounter along the way. I ended that post with a mention of the Import and Export Data Wizard to copy the data from your SQL 2008 instance to your SQL Azure instance. All I really said was you had to choose .Net Framework Data Provider for SQL Server as the connection type.
I’m seeing several questions on how to use the Import and Export Data wizard this way. So I figured I’d walk you through this. I’d like to point out now, that SQL Azure can be the source location or the destination. The settings I use for SQL Azure is the important part of this lesson, not whether it is the source or destination. For this lesson, I’m going to assume that you have a SQL 2008 server with a database and a SQL Azure instance with a database.
- From your local machine, go to the start menu, and open your Microsoft SQL Server programs folder, and find the icon for “Import and Export Data. If you’re running a 64-bit Operating system, you may have two options, one 32-bit, one 64-bit. I leave the choice up to you
 , but I usually use the 64-bit version. I haven’t had any issues of choosing one over the other.
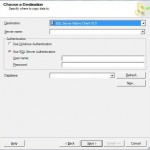
 - You’ll be prompted to “choose a data source”. For this example I’ll use my SQL Server. This means using “SQL Server Native Client 10.0” for the Data Source Type (the drop down list).
- You’ll have to choose your Server and database. You’ll also have to choose either Windows or SQL Server Authentication, and enter your credentials for the server. Once all that’s filled in, click next.
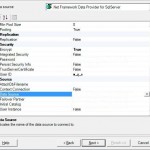
- For the destination I’m using my Azure Database instance, so for the Data Source Type, choose “.Net Framework Data Provider for SQL Server”, the interface will change to a property sheet where you can fill in all the data for your connection string.
- Scroll to the bottom and fill in the following options
- Under Security, Encrypt, choose true.
- Enter your User ID.
- Enter your Password.
- For Data Source, enter your full SQL Azure Instance Name. This should be instanceName.database.windows.net
- For initial Catalog, choose the Database name you want to use
- Click next.
- On the next screen you have two methods to copy data. You can either choose tables to copy, or you can write a query. Writing a query is reserved for a time when you want to do something more than simply move from a SQL Server instance to a SQL Azure instance, so I’ll leave that for next time. Choose “Copy data from one or more tables or views”, then click next.
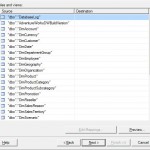
- Choose the tables you wish to copy. When you’re done, click Next.
 On the final screen, you can either save this SSIS package, or just click Finish to run. In my case, I’ll hit Finish.
- On the final screen, you will get feedback on the results of the copy. If you have any problems, email me, and I’ll do what I can to walk you through your issues.
This should put you well on your way to migrating your data from SQL Servers running locally, to SQL Azure instances in the cloud! It’s a journey, but an amazing one to take! Let me know if you need any help along the way.
