I’m pulling the directions for using the interrogator out of the main page into this separate page since I don’t have the project files on hand. You can use the BimlExpress files with these instructions, but you will need to adjust the code slightly. If you run in to troubles, let me know.
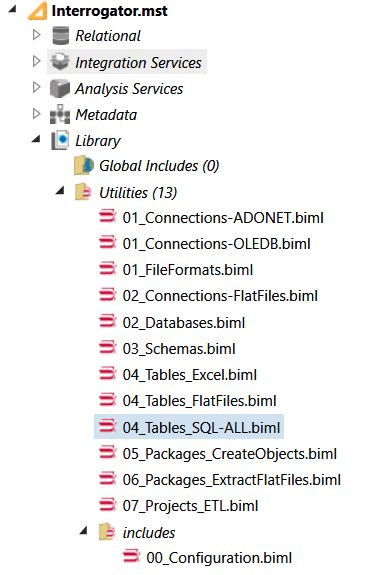
Open Biml\Interrogator\BimlStudio Project\Interrogator.mst from the folder where you cloned the repository. You can collapse the Relational, Integration Services, Analysis Services, and Metadata folders. The files you want to pay attention to are all in the Utilities folder. I’ve ordered the files in this folder numerically based on dependency order. Connections only depend on the configuration values, so you can run those first. Databases require both connections and configuration values, so you have to run those scripts second.
Things get a little intertwined with Connections to flat files. I could have written 02_Connections-Flatfiles.biml differently so it could have been run along with the other 01_*.biml scripts. Since I wrote it so that it depends on the FileFormats being created first, they must be run second.
Go ahead and open up includes\00_Configuration.biml.
This file holds all the configuration values that other biml files in this project will depend on. You can set your server and database name here. This server and instance should be your development instance. In my case, I called my development database Interrogator, and run it from my local default instance.
As a help, I’ve included code on lines 10 – 17 that will create your development database if it doesn’t already exist. The actual function is included on lines 36 – 50.
You’ll also need to set the variable sourceFolder to the location on your machine where you will save your source files. In my case, I store them right in the repository’s folder in a subfolder called testdata. In this demo I’m just going to scan for .csv files, but you could put other files here too, and update the code to scan for more file types.
Building Biml Connections
Once the configuration file is updated for your environment, open 01_Connections-ADONET.biml and 01_Connections-OLEDB.biml. These scripts are going to set up connections in the Relational folder we’ll use in subsequent steps. When the Biml compiler goes to reference a database object, it has to have a connection object defined to do so.
The ADONET script will create an ADO.Net connection to our Extract database referenced in the configuration file as well as an ADO.Net connection to AdventuresWorks 2014 on your local instance. The AdventureWorks connection is used by script 04_Tables_SQL-ALL.biml. If you don’t want to run that demo, or if you do not have AdventureWorks set up on your local instance, feel free to comment this part of the script out by wrapping the Adventureworks connection in XML comment tags:
<!-- -->
The OLEDB version sets up an OLEDB connection to our Extract database, as well as two connections to an Excel file in our testdata folder. This Excel connection and file are used in the 04_Tables_Excel.biml demo. Feel free to comment that out as well if you are not going to run the Excel demo.
Simply right click on each of the files and choose Execute BimlScript to generate the connections in Relational\Connections.
Building Biml File Formats
Similar to connections, we’re going to need to define the file formats in Biml before we can use them in packages. Each file of type CSV or TXT in your sourceFolder will be scanned and a File format will be generated.
Right click on 01_FileFormats.biml and choose Execute BimlScript to generate the FileFormats in your Relational\FileFormats folder.
After the FileFormats are written, right click on 02_Connections-FlatFiles.biml, and connections for these files will be created along side your ADONET and OLEDB connections.
Build Biml Destination Reference Objects
Now, we need a reference to our destination Database and Extract Schema. Right click on 02_Databases.biml to create a reference to the Extract database. Right click on 03_Schemas.biml to create a reference to the Extract Schema within the Extract Database. These are each created in their own folder under the Relational folder in your BimlStudio solution.
03_Schemas.biml will also create the Extract Schema within your Extract database if it doesn’t already exist. This is a development helper to prevent any errors later on if you were to skip running the CreateObjects package.
If you want to explore the Excel example, feel free to execute 04_Tables-Excel.biml. This will connect to the ExcelSource.xlsx demo file in the testdata folder and create a destination table for that data. Notice how it currently detects all the data types as Object with a length of 255. Excel cannot reliably return useful metadata. If you were to pass the columns into the Interrogator, you could “guess” at the appropriate metadata. More on that after I document the Interrogator.cs file.
You will want to execute 04_Tables_FlatFiles.biml to create biml destination reference objects for each of the flat files in the test data folder. These will be created in the Relational\Tables folder. When the tables are created in your project, each one will be given an Attribute Tag of type TableGroup. This tag will be set to FlatFile. When we generate packages for these tables, only those with this tag will get created.
If you want to see what metadata you can get from SQL server, feel free to execute 04_Tables-SQL-ALL.biml and a destination reference table will be created for each table in Adventureworks2014.
Build a package to create your destination objects
Wouldn’t it be nice if you had a package you could hand off to your deployment DBA that would create your Extract schema and necessary destination objects in that schema? 05_Packages_CreateObjects.biml will do just that!
Build Extract packages for your FlatFiles
For each table in Relational\Tables that has the Attribute Tag TableGroup set to FlatFile a truncate and load package will be generated in your biml solution. As a precaution, I’ve also updated this script to create the Extract table in your Extract database, just in case you skip the step to deploy the table. I do this by calling a function in DevelopmentHelper.cs called DeployDBObject.
Right click on 06_Packages_ExtractFlatFiles.biml and select Execute BimlScript. Several packages will be created in Integration Services\Packages.
Remember, this only creates the biml representation of the package. If you want to create the actual DTSX file, look for the package in Integration Services\Packages. Right click on the package and choose Build. You can then open the package in Visual Studio with SSDT and see the generated asset.
Build an SSDT Project to hold all your packages
If you want a project to hold all the generated packages, Right click on 07_Projects_ETL.biml and select Execute BimlScript. To actually create that project, find the project in Integration Services\Projects, right click on it and select Build.
That’s it!