Currently, there are two ways we can construct our skill. You can use the Amazon developer portal, or you can use the Alexa Skills Kit Command Line Interface (ASK CLI). Unfortunately, the CLI option is based in Node.js. I’m not a fan, thus the reason I started writing my skills in C# instead. Alexa Skills Kit does have an API, and I do see an opportunity for someone to write a PowerShell wrapper for these same commands, but that’s not going to be me…at least not today. For this demo, I’m going to use the portal for configuring the skill, and then switch over to Visual Studio and the Azure portal to deploy the custom code.
In the future, when it’s time to build improvements, you’ll have to use some kind of command line interface to automate configuration changes and deployments, otherwise, you’ll have to manually process those changes every time. And no one has time for that.
Let’s Begin!
I’m going to assume you’ve already set up your Amazon Developer Account and start by going to https://developer.amazon.com. From here, click on “Alexa” on the main menu.
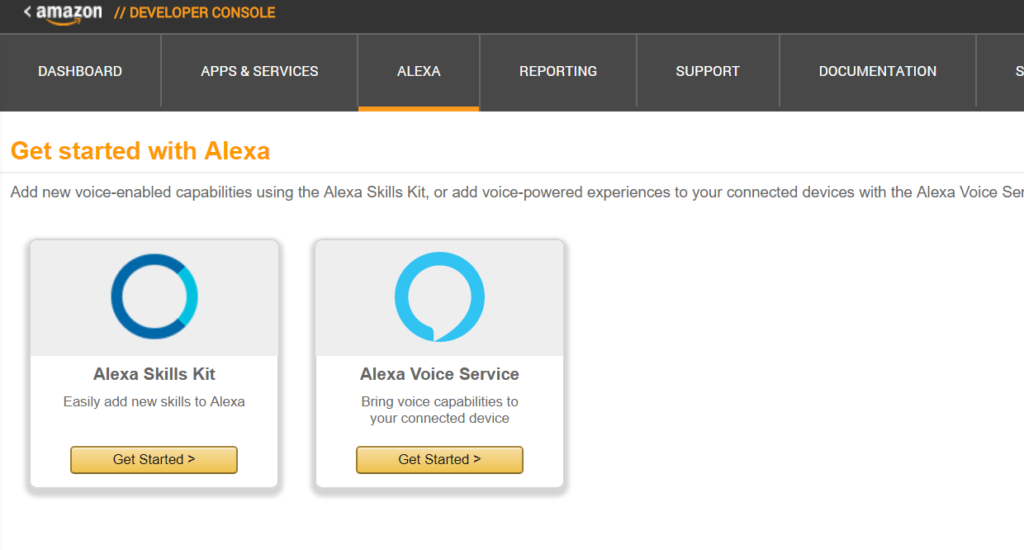
We’re building a skill, so click Get Started in the Alexa Skills Kit box. You’re dumped onto a screen listing your current skills. In the upper right, there’s a button to Add a new skill. Click that to jump into a wizard.
Skill Information
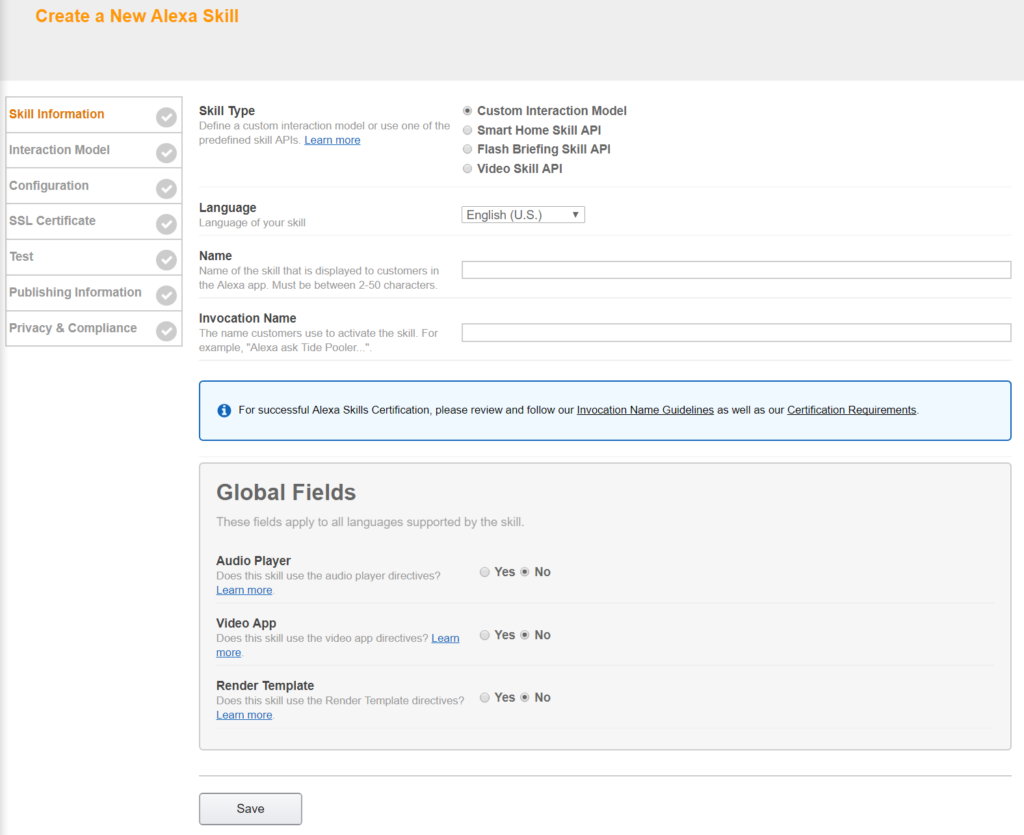
This wizard is divided into 7 pages, we’ll work on each page together. We start with Skill Information. The wizard links to Amazon documentation on the four types. You can also refer back to my first Alexa article for more information. In this case, we’re dealing with visitors in our lobby, so we select Custom Interaction Model.
For language, Alexa will currently understand 5 variants of English, German, and Japanese. You can only select one now, but you can override this later to add multi-lingual support.
“Name” is what this skill will be listed as in the Alexa Skills Library. In this case, we’re just calling this skill Receptionist.
Invocation Name is what you’ll say immediately after “Alexa ask…”, or “Alexa tell…” in order to get ASK to direct the request to our skill. There are several rules around what you can set for your invocation name. In general, the invocation name must be two words. And most simple words like “a”, “an”, or “the” are disallowed. In this case, we’ll use an invocation name of “company receptionist”. In theory, we could build branded skills for different companies and release the same skill for multiple companies. This skill might also be a skill best delivered via private distribution in the Alexa for Business model.
Click Save to continue.
Interaction Model
On the next page, we’re going to take the interaction model we designed last time and create the JSON representation of it.
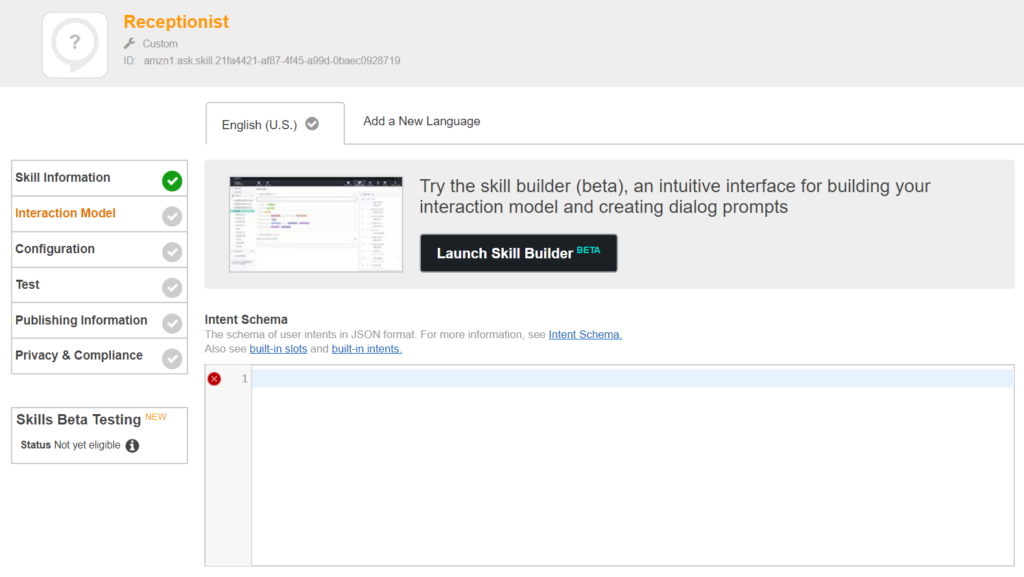
We can write the intent schema out by hand, and then paste it into the Intent Schema box, but the Skill Builder tool makes this a bit easier. Click its button to open it!
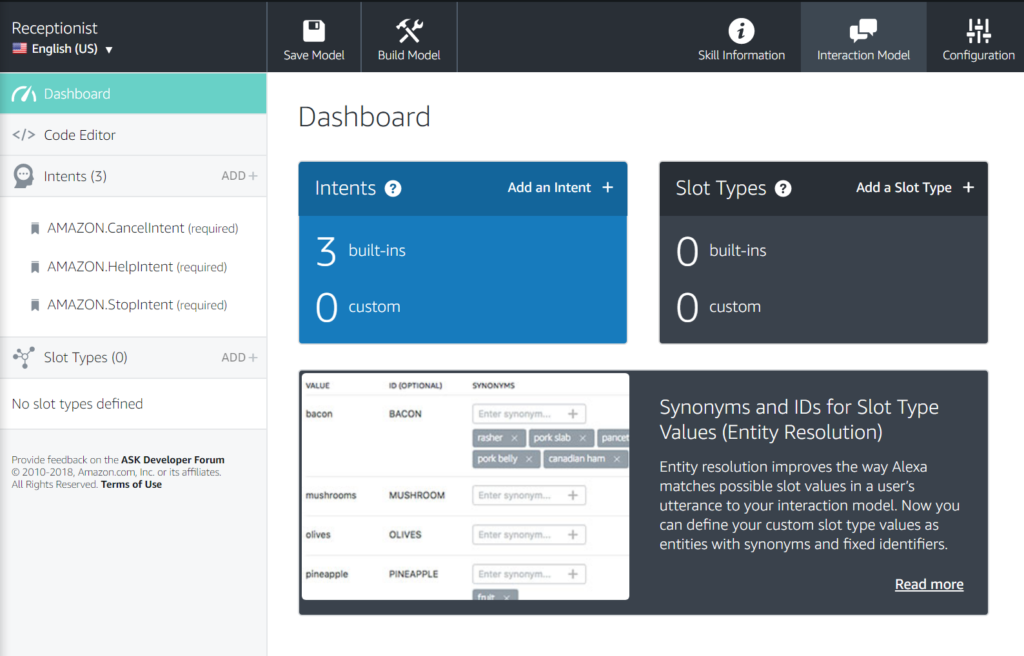
You land on the dashboard. You’ll notice you’ve had three intents added to your model automatically: cancel, help, and stop. We’re going to add our VisitorArrived intent now. Click Add+ to the right of Intents to add our new intent.
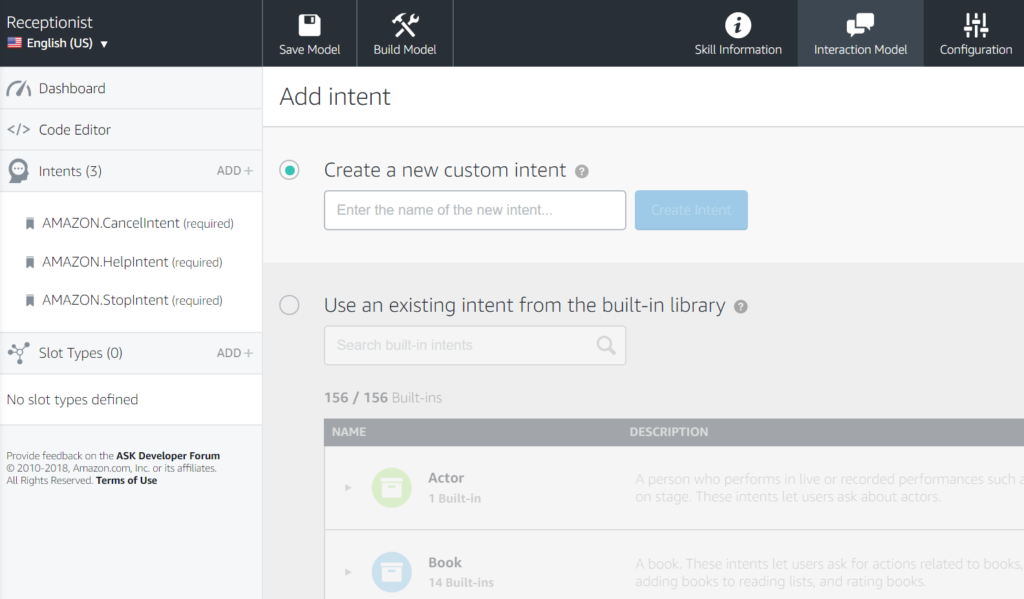
Amazon has added many out of the box intents if you want to explore them. In our case, we’re going to start with a blank slate and name our custom intent VisitorArrived. When you hit the Create Intent button, you move on to entering utterances and slots.
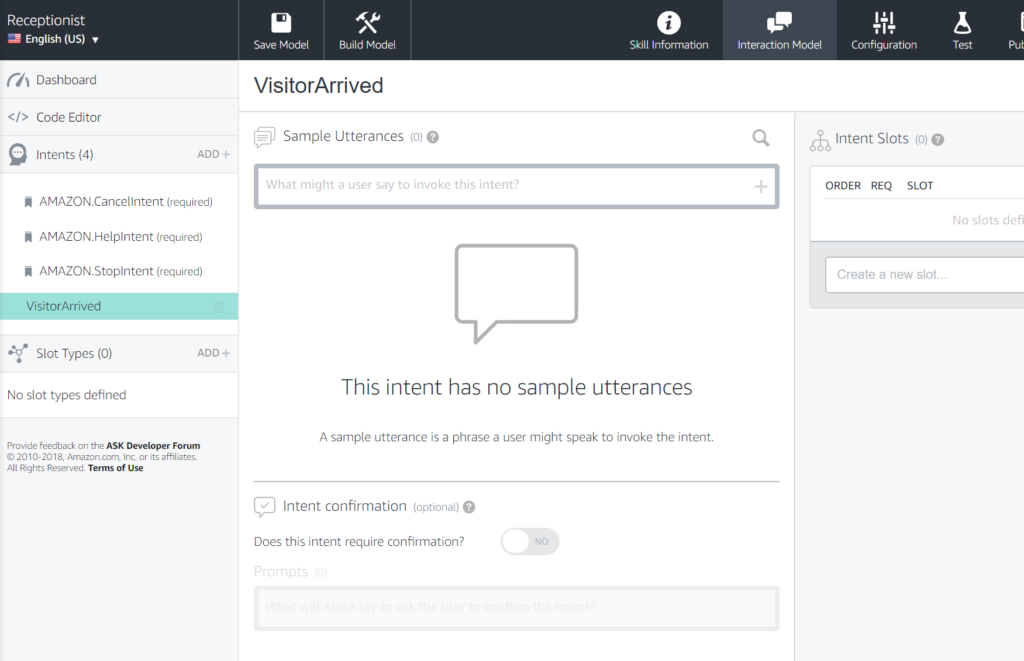
I have four utterances in my design:
- <Visitor> is here.
- <Visitor>is here to see <Employee>
- I’m here to see <Employee>
- Is <Employee> Available?

Each of them requires at least one slot to be defined. So we’ll start by using the Intent Slot’s section on the right. We’re going to define Visitor and Employee (previously in my drawings I had referred to this slot as “who”). Let’s start by creating a slot for Visitor. We just type in Visitor in the “Create a new slot…” text box and hit add.
We have to define a type for the slot. Amazon has many types already set up for things like actor, book, airport, date, and movie. But in our case, we’re expecting a name to be passed in, and we’re going to use that to do a lookup.
There’s not a prebuilt type for names, so we’re going to add a custom slot type, called Name, and add it to the list. Just click the down arrow under visitor, type “Name” into the “Create a new slot type…” text box and hit enter.
Custom Slot Types
When using custom types like names, you have to provide some sample values. This list of sample values doesn’t have to be exhaustive, but it should be representative. How many ways can users say a name?
You could just give the first name, or maybe a first and last name. You need to give an example of each “form” of slot you expect. I only gave three options for name forms in my slot values.
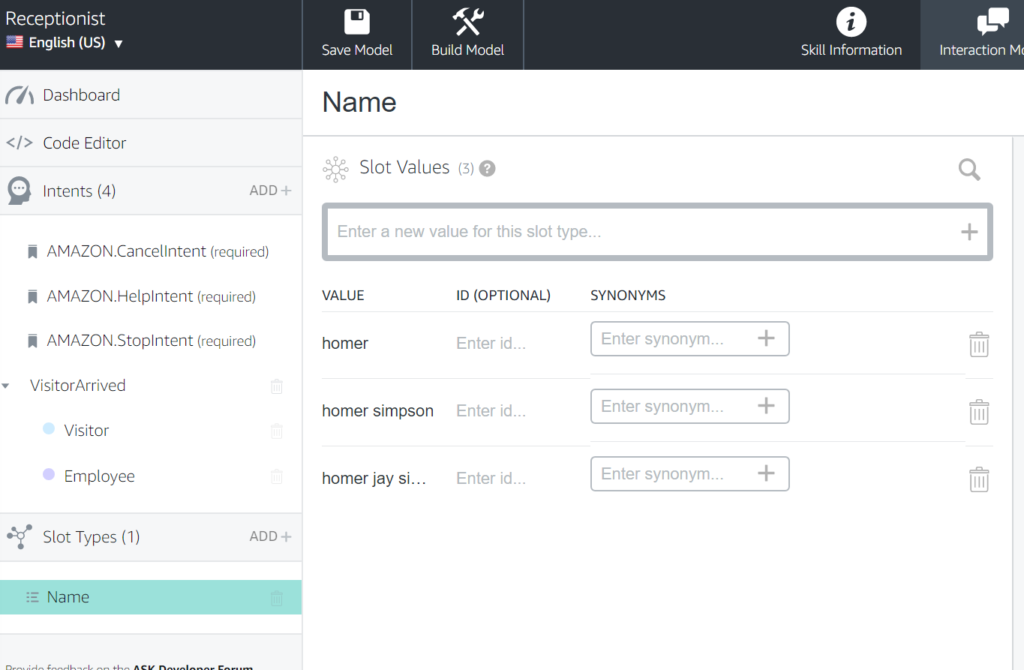
Now, with our slot type and slot values defined for “Name”, we can add our Employee slot. Once we’ve added it, select Name as the slot type.
With our slots defined, we can add our utterances from above. To start adding utterances, we simply type them into the text box under Sample Utterances. When you want to include one of your slots, add a leading curly brace, and then the name. For example, “{Visitor} is here”.
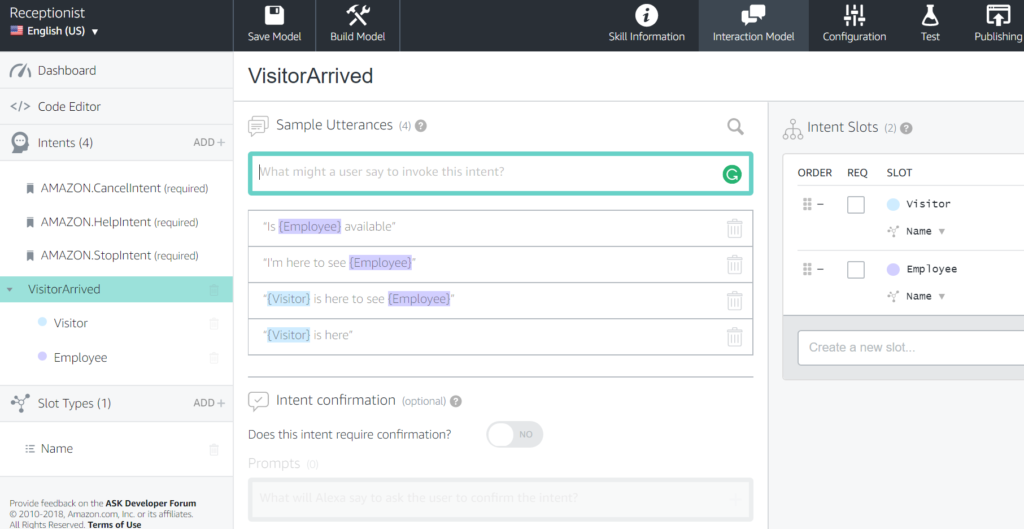
If your skill needs confirmations, like the “are you sure” prompts in Windows, you can define those here. In this case, we don’t need that, so we’ll save our model and continue on. Hit “Save Model” at the top of the page, and after you get a success notification, click on the configuration button at the top.

Notice that you’ve exited the skill builder, and returned to the developer console on the Configuration tab. Notice that Amazon much prefers you to use AWS Lambda here.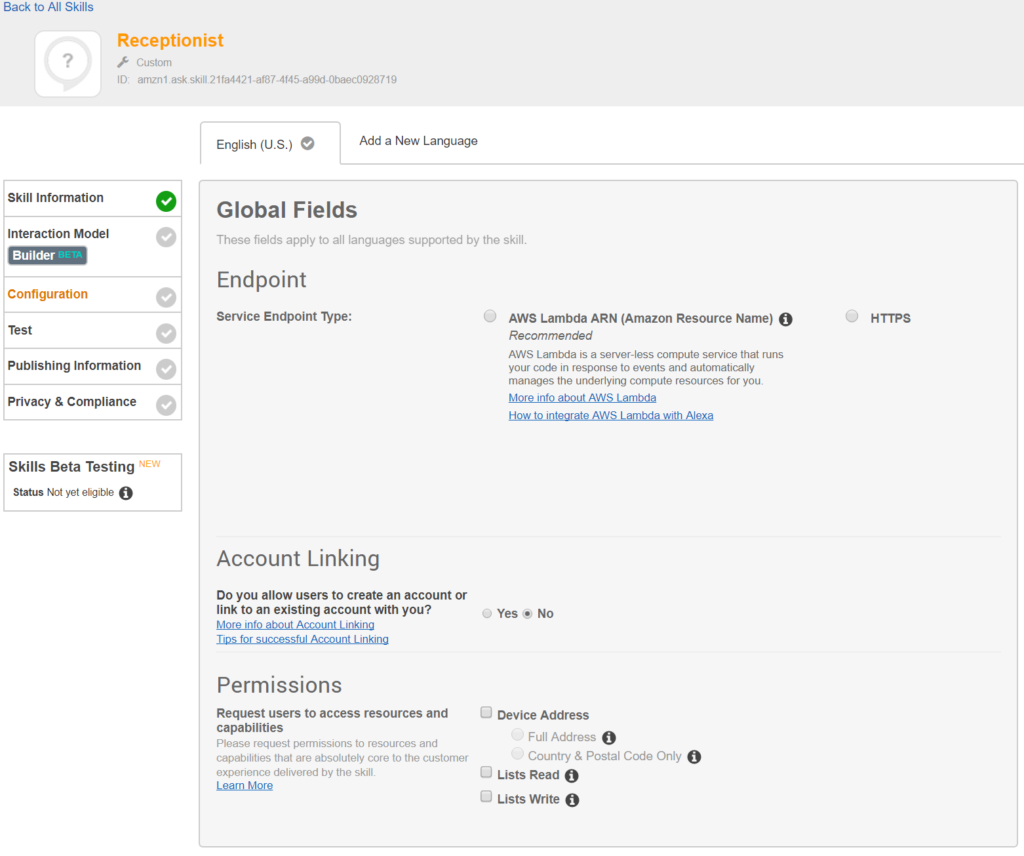
We’re going to choose the HTTPS option, but we don’t have one built yet, so we’ll stop here for today. Next time we’ll pick up with building out a Microsoft Azure function to handle the requests and responses for this skill. In the meantime, if you have any questions, please send them in. I’m here to help!