
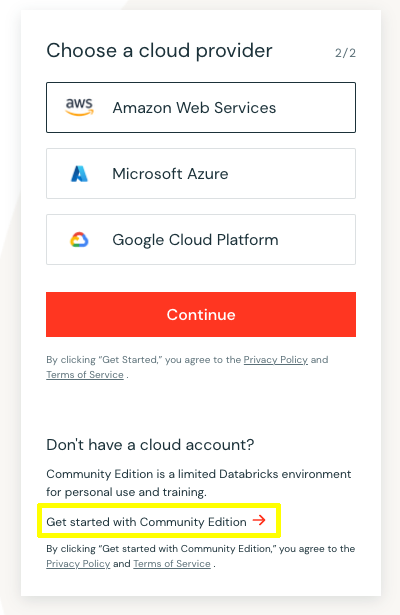
Now that you’ve had an introduction let’s get started exploring Databricks. Head to https://community.cloud.databricks.com and click the sign up link at the bottom. The community edition is a completely free option.

Fill in your contact information. It may help to use a ‘+’ email address to sign up; that way, you can later sign up for a full account and keep access to the community account for educational purposes. After entering your contact info, select the “Get started with Community Edition” link, not the continue button. If you choose AWS, there is no free option. A one-day trial costs about $20 in compute and storage fees. If you choose Azure, you can get 14-day free trials. You have to spin up a new trial every two weeks. I have not attempted a free trial on GCP yet.
With a password set, you can log in to Databricks. You’ll get a reset password email from Databricks within a few minutes. This trial allows you to create notebooks, tables, and a cluster. Unfortunately, this trial doesn’t give you access to the SQL persona, Workflows, or Unity Catalog.
Most importantly, it doesn’t allow you to set up personal access tokens. That means you can’t access Databricks through visual studio. If you missed the article Notebooks Explore Data, check it out now.
To create your resources, you’ll need an Azure subscription with at least Contributor rights. So after you’ve spent some time in Databricks using the Web UI, you’ll want to spin up a Databricks workspace in your Azure subscription. Don’t worry; I’ll help you set up your instance so that you’ll spend pennies instead of dollars. Worst case scenario, you can sign up for a free trial. You do have to enter a credit card to use the free trial.
Setting up Databricks through Azure Portal
Click “Create a resource” from your portal, and type in Databricks into the search box.
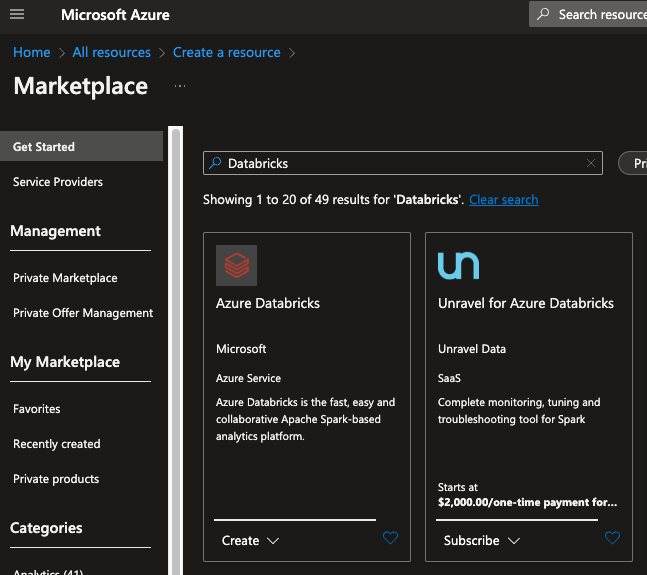
Click the Create button at the bottom of the Azure Databricks cell. You’ll land on the Basics tab of the Create an Azure Databricks workspace wizard.
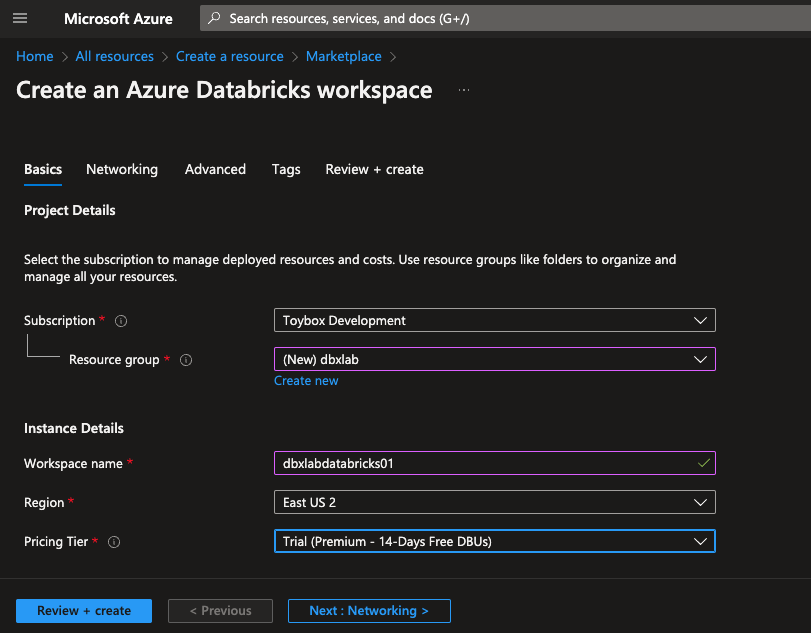
Your subscription will be pre-selected. You can change this to another subscription you can access if you want. You could choose any resource group you have already created for your resource group. I suggest you select a resource group with no other resources defined. This will make cleaning up easier when you reach the end of the trial.
I generally name my resource groups the same as the environment name. So, in this case, I create a new resource group, dbxlab. This will be reused every 14 days for my databricks lab environment. I won’t use this instance for anything other than educational use.
Next, any Azure resources that aren’t generated automatically are named <environment><resource type><counter>. All are lowercase, with no spaces. In this case, dbxlabdatabricks01.
Choose a region close to you or close to any data you’ve already stored and will access through this new instance of Databricks. You may notice network latency if you choose a region far away from you. You will be charged egress fees if you access data in one region using a databricks instance in another region. While this fee isn’t significant, It can add up over time.
You can skip the Networking, advanced, and Tags tabs for now. Click on the “Review + create” tab.
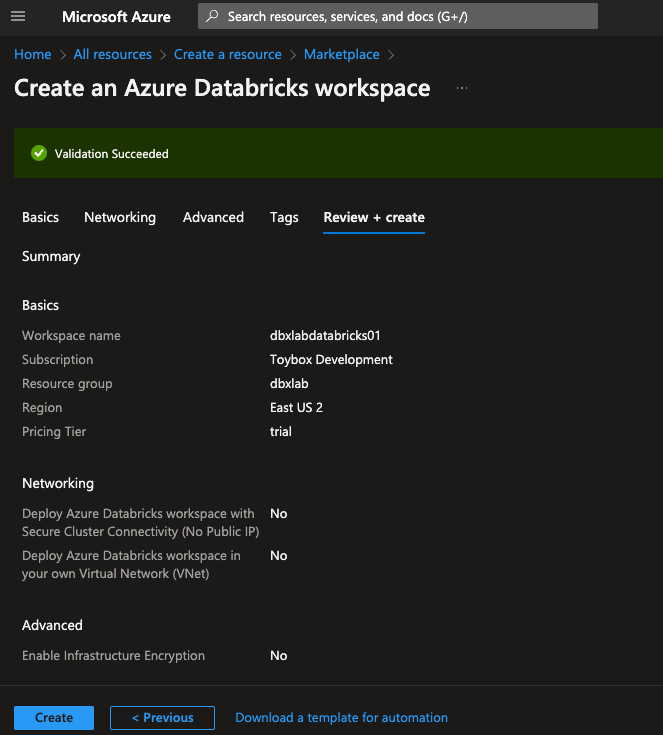
This will summarize your Databricks instance settings. Before clicking Create, click “Download a template for automation.” Download a copy of this template for later. That way, we’ll be able to spin up a new trial after the current one expires. After the download completes, click Create. Provisioning can take up to five minutes to complete.
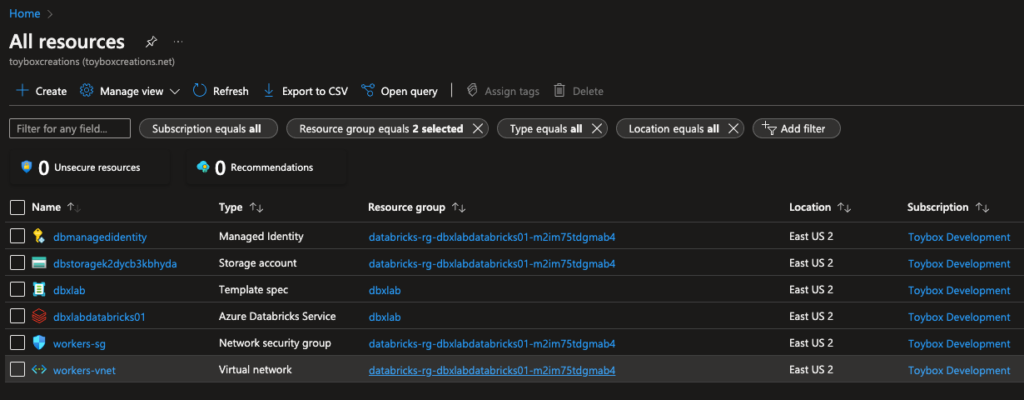
Once complete, you should find five new resources. There are six in mine because I saved a copy of the deployment template to my dbxlabs resource group. Notice that four resources are in a new resource group you didn’t create. The new Databricks workspace will use the managed identity to access resources like the new storage account. You can use this managed identity to access other resources like Keyvault or other storage accounts. We’ll discuss this more in later blog entries.
The storage account is where Databricks stores data in dbfs, a special mount point that acts like ‘/’ in Linux-based systems.
The network security group and virtual network are there if you want to control how network traffic moves around Azure when completing workloads for you. I don’t plan on covering that in this current blog series.
With these resources provisioned, you can click “Launch Workspace” from the Azure Databricks service resource and log in using your Azure Active Directory credentials. On your first login, you’re asked, “what’s your current data project?” Choose any option you wish.
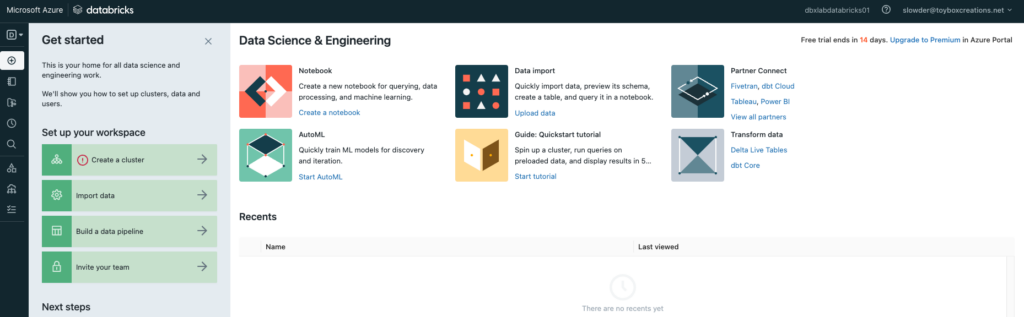
This is the same portal you saw in the community edition.
Conclusion
You can get started with the community edition if you’re just getting started and aren’t ready to learn more formal development practices in Databricks. It has most of the features you’ll need as a beginner. In my next entry, we’re going to set up Visual Studio Code to get more serious with our development skills. From there, we’ll start learning some introductory Python and developing Data Engineering code.
In the meantime, if you have any questions, let me know!