You’ve just received a new dataset, and you have to analyze it to prepare for building out the d ta ingestion pipeline. But first, we’ll need to create a cluster to run our analysis. Let’s run through a simple data analysis exercise using Databricks and Visual Studio Code (VSC).
Create a cluster from the Web UI
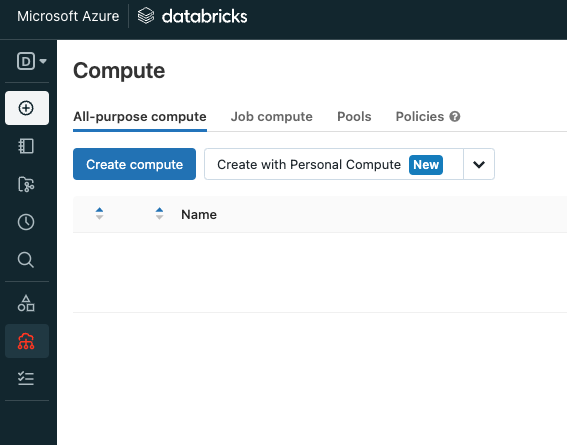
From the Web UI, click the compute icon on the left panel, then click “Create compute” under the All-purpose compute tab. If you click on the plus s bol to add a cluster from VSC, you’ll get a prompt asking if you want to open a web browser to your databricks workspace. The link the extension-in tries to open is a malformed URL. I submitted an issue to get that fixed.
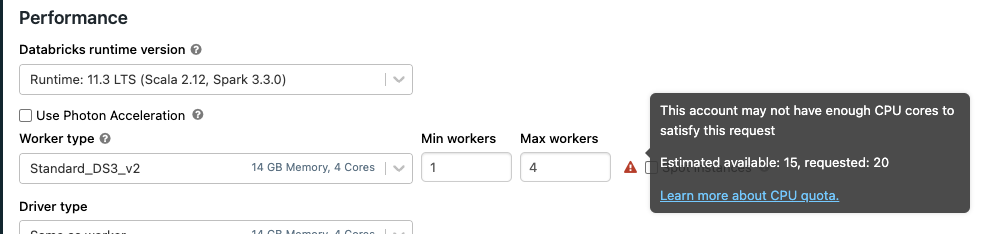
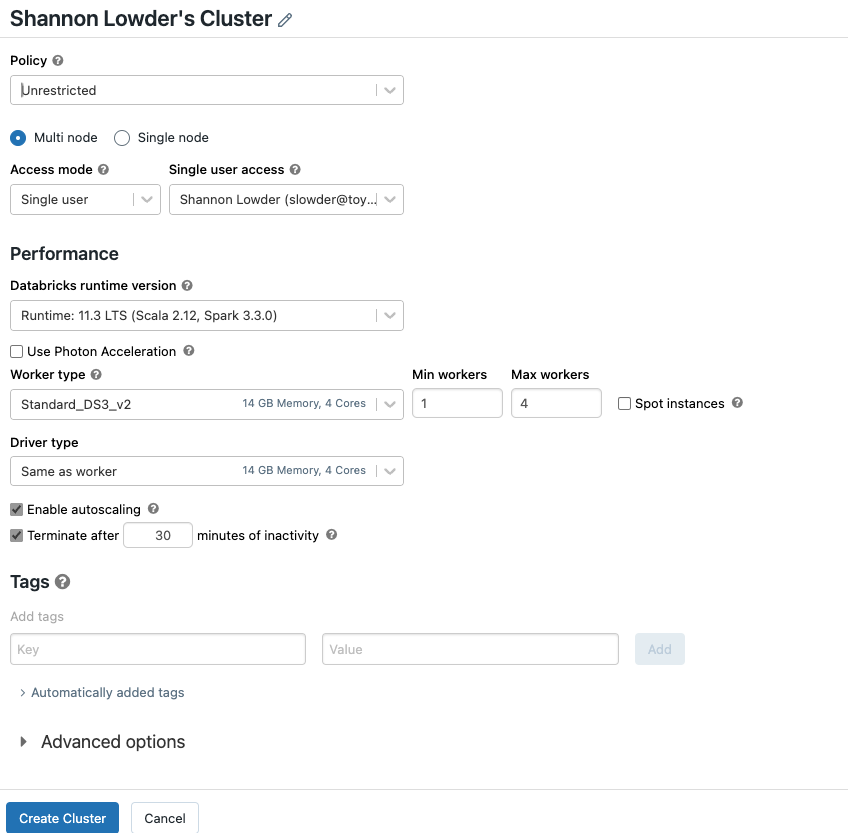
Since this is a free 14-day trial, we’ll spin up a multi-node cluster. The wizard will default give the new cluster “<Your Name>’s Cluster.” Feel free to change that. Since this is an unshared demo, we’ll put it in single-user access mode. We’ll leave the runtime set to 11.3 since that’s the current “Long Term Support” version of Databricks.
For worker type, leave it DS3 version 2. That’s plenty of horsepower for our test. I would change up the minimum number of workers to 1 and the maximum to 4. If you get a warning to the right of Max workers, you’ll have to go into your Azure quota and request an increase.
Azure Quotas
Quotas are a way of controlling your costs in Azure. You can limit the number of a given resource type. In my case, default quotas are still in place for compute resources in East US2. To resolve that, I open quotas in the azure portal and click Compute, then limit my regions to East US2.

You’ll notice there are still 135 quotas that could be set in East US2. Since we’re trying to provision Standard_DS3_v2 workers, enter “Standard DS” into the search box. That drops the number of quotas to six.
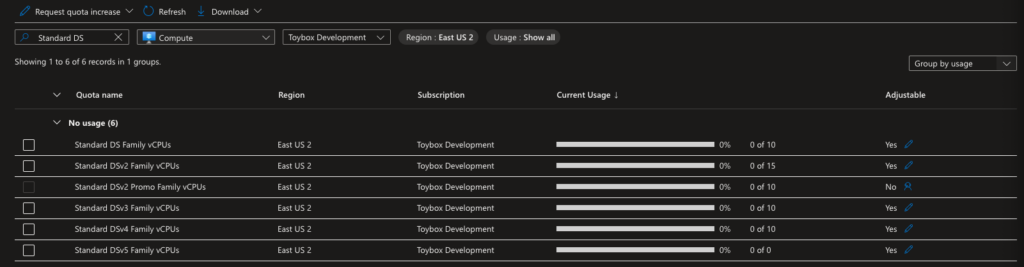
You’ll notice that my quota for Standard DSv2 Family vCPUs is currently 0 of 15. 15 is what the original warning said I had available. All I have to do is hit the pencil icon at the far right of this line and request 20 as my new limit. It takes a couple of minutes for the quota to increase.
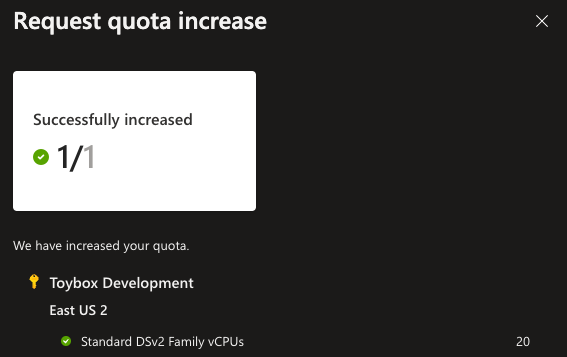
Once you see the success message, we can return to the Create Cluster page in Databricks. If you refresh the page, you’ll notice the warning goes away. The only other setting I changed on this page is the Terminate after 120 minutes of inactivity to 30 minutes. No need to leave a cluster running for two hours without any work. If you were paying for your compute, those unused hours would cost you!
Now you’re ready to create your cluster. After clicking Create Cluster, you may have to wait five minutes or more for your new cluster to finish building. While waiting for your cluster to finish setting up, you will be able to see it over in VSC.
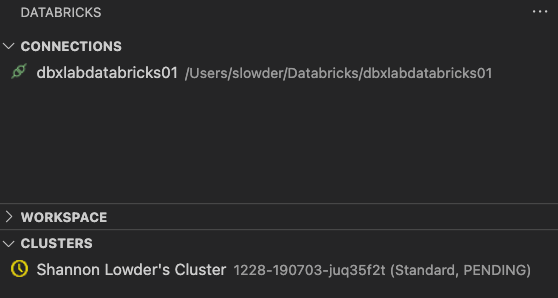
Databricks also starts your cluster as soon as it’s set up.
Work with Databricks Workspace in VSC
By default, Visual Studio Code lists Explorer as the first icon on your left pane. You would use this to open a single folder (or repository) and explore files inside that folder. The problem was that many projects require you to open several folders simultaneously to work effectively. For example, you would open your source code folder and the source data folder when building ETL projects. That way, you could build code to ingest files.
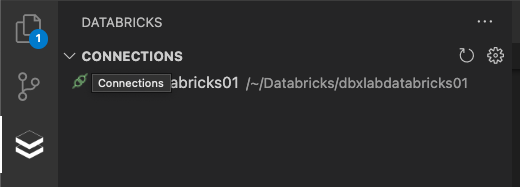
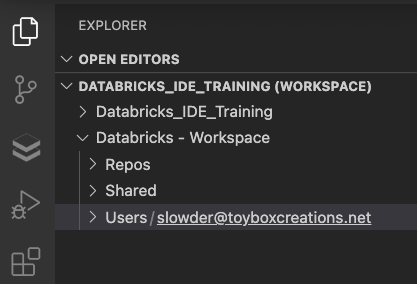
When you work with Databricks projects, you want to open your local copy of the repo and your Databricks workspace. The Databricks extension allows you to do that easily. Open the workspace section in the Databricks extension. Click on the “Add Databricks Workspace to VSCode workspace button.

When you return to the Extension pane, you will see your Databricks workspace and any folders you have opened. In my case, I have a training repository that holds demo code I’ll share throughout this blog series.
Let’s create our first notebook in our local databricks workspace. Right-click your user folder, and choose “New File.” Give it any name with the extension ipynb. Right-click on your new file and choose “Open with” and then “Configure default editor for ‘*.ipynb.'” Then select “Jupyter Notebook.
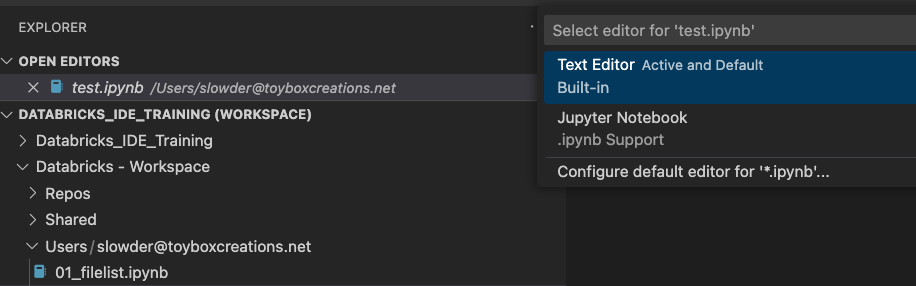
From now on, you can double-click ipynb files and get them to open with the Jupyter Notebook editor.
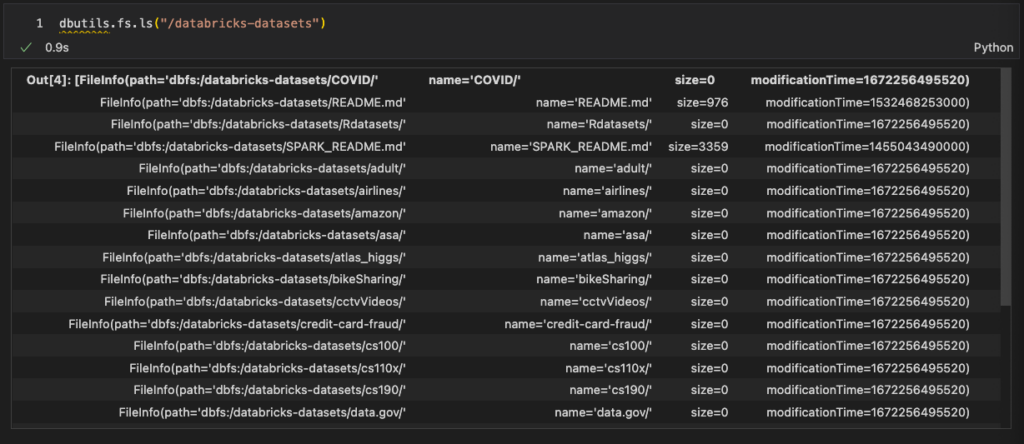
Our first notebook will look at the sample data available to all Databricks workspaces. Check out the File System utilities available in Databricks. That’s where I set up my Databricks workspace. We’ll use dbutils.fs.ls to read the contents of the /databricks-datasets folder.
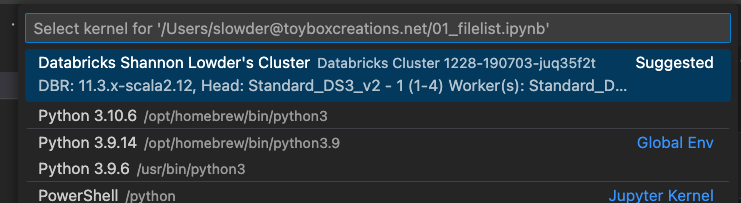
dbutils.fs.ls("/databricks-datasets")Hit Shift + Enter to run the cell. You’ll be prompted to select an engine to run the cell. Choose the cluster you created in our previous step.
Within a few seconds, you should see results.
Using your new setup, you could work through Microsoft’s NYC Taxi workshop!
Conclusion
You’ve now set up a cluster and used that cluster to look at demo data. You could continue this way for all of your analysis work. Next time, we’ll take this a step further and set up a local spark engine to develop our data engineering workloads offline. That way, we’re not paying for development and debugging time. We’re only paying for our production workloads.
As usual, if you have any questions, please let me know!