A few weeks back, Microsoft announced its newest data offering, Fabric. After spending a little time with marketing materials, documentation, and some hands-on time I’ve learned a few things. The short version is this is just the next step of Synapse. Where Synapse merged Azure Data factory, SQL Data Warehouse, and a spark engine, Fabric adds in Purview and PowerBI. Purview isn’t new either, it’s the successor to Azure Data Catalog. With this new combination, Microsoft now has a stronger argument than Databricks or Snowflake.
Databricks and Snowflake have limited visualization tools. In fact, nearly all the clients I work with that use Databricks, send their data into PowerBI for visualization. So if you’re looking to start a modern data estate project, the question becomes why use one product to ingest data, a separate product to manipulate the data, and yet another to present it to your stakeholders? Microsoft has a one-stop shop.
If you’re already in Databricks or Snowflake, you don’t have to abandon them, you could use them in tandem with Fabric. With Microsoft’s concept of OneLake, you can use what they call shortcuts to virtualize that data into your Fabric environment.
And that’s a demo I’d like to share here.
NHL Data
I like to use NHL data for many of my demos due to the complexity of the data. I use it so often that I keep a copy of the raw JSON data in a data lake in ADLS. Today, we’re going to make that data available to my Fabric instance, and then create a simple bronze layer on top.
We start by opening our Lakehouse in Fabric and then clicking the ellipses to the right of the files folder.

Click on New shortcut. Then choose Azure Data Lake Storage Gen 2.

Enter the URL to your storage account, you can find this in your Azure Portal under your storage account. It should follow the pattern https://<storage account name>.dfs.core.windows.net/<container name>. Be sure you use the dfs link and not the blob link. You may see errors if you try to use the blob link.
Enter a name for this new connection, as well as choose the authentication method you wish to use. You can choose an Organizational account, and you’ll get Azure Active Directory (AAD) credential passthrough. That’s the option I chose. You could choose to use one of the account keys or a shared access signature associated with that storage account. You can also choose to use a service principal, but that would require extra setup in AAD.

Click next to continue. You’ll then get a prompt to give this shortcut a name, I chose to name mine devtcdatalake02_nhl, to make it easy to recognize the storage account and container name. Optionally, you can choose to define a subpath here, and limit access to a single folder in your storage container. In my case, I’m leaving it open to the whole NHL container.

Once complete, you should see the contents of the folder you referenced in your config.

You can see the main folders in my data lake here. With my shortcut defined, let’s create a new notebook, so we can define delta tables for my raw files.
Defining our Delta Tables
On the left pane, you can see the Files folder, pivot that open and you should now see your datalake shortcut. PIvot that open, and you can traverse down to the folder containing the data you want to establish your Delta table for. Click the ellipses to the right of that folder, and choose copy ABFS path. We’ll need that for our dataframe

The code to read in data, and then write it back out to delta is simple:
df = spark.read.json(“<full ABFS path you copied earlier”)
df.write.mode(“overwrite”).format(“delta”).saveAsTable(“<table name>”)
In my case it looks like the following.

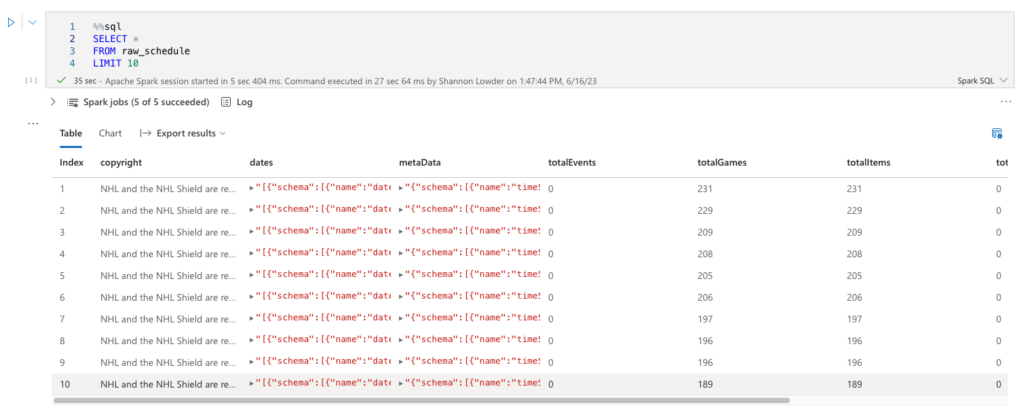
You can now run the cell by clicking the play button to the left, or by clicking Shift+Enter, just like VSC or Databricks notebooks. Unlike Databricks, Fabric will provision its own resources to run, no need to set up a cluster ahead of time. Once complete, we can query our now bronzed data.

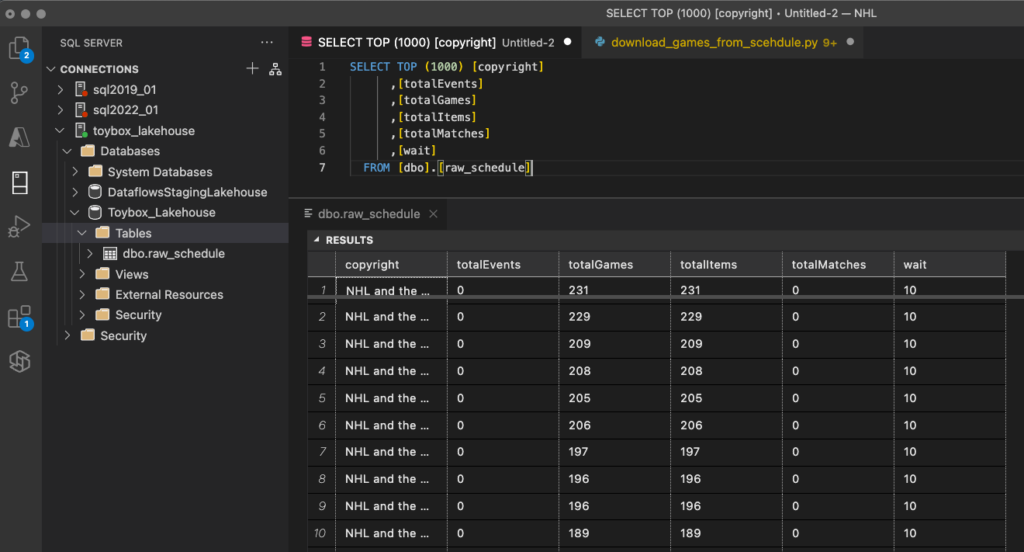
Also, now that we’ve created our first table, we can go to the Data Warehouse experience or to Visual Studio Code (VSC)/ Azure Data Studio, and query from there! In my case, I want to query in VSC. To get your servername, go to My Workspace on the left bar, and then scroll down until you see your SQL endpoint. Mine’s named “Toybox_Lakehouse, just like my Lakehouse. If you click the elipses to the right of your SQL Endpoint, and choose copy connection string, you’ll get your servername copied to your clipboard.

Then, go to VSC, add a new SQL Connection, paste in your servername. You’ll be prompted for an Authentication method, use AAD Integrated, and you’ll then get a web browser asking you to log in to your Azure AD account again. Once that completes, you can name your connection and begin using it!

But wait, there’s more!
You didn’t think I’d cover a Data Engineering topic without sharing a metadata-driven approach to make things easier, did you? Since my raw folder has a parent folder for each of my NHL subject areas, and all my raw data is in JSON format, I can create a table for each of these!

for subject in mssparkutils.fs.ls("<abfs path to my raw folder>"):
    print(f"{subject.name} --> raw_{subject.name}")
    df = spark.read.json(subject.path)
     df.write.mode("overwrite").format("delta").saveAsTable(f"raw_{subject.name}")
Keep in mind, this only works with relatively simple JSON, for more complex schemas, you’d want to sample one of the files in the source, and then use that schema to read the rest of the files.
Next Time
I’m going to build a few raw to bronze transforms in fabric, and compare those to ones I’ve built in the past using Databricks. It should be interesting to see how these transforms compare. In the mean time, if you have any questions, let me know!