Setting up Delta Sharing in Databricks is straightforward once you understand the diagram provided in the Azure Databricks documentation.

Delta sharing is implemented as a part of Databrick’s Unity Catalog. Unity catalog is the official data governance solution for Databricks. You can consider it an extension to the metastore catalog or Databricks version of a data catalog. You can define datasets, columns, and permissions from a single service. Setting up Unity Catalog is outside this article, but I’ll put together a walkthrough later. For the rest of this article, we’ll assume that you’ve got Unity Catalog set up and you have connected your Databricks workspace to that catalog.
In Unity Catalog, you can define databases and objects. You can see these represented down the left side of the diagram. Delta Shares are also defined in the Delta catalog. Once a share is defined, you can add tables. You can then grant recipients access to those shares. Once configured, users can read the data you’ve shared.
Define the Share
From your workspace, click Data on your left pane. You can do this from the Data Engineer or SQL experience.

You can see all the datasets defined in your unity catalog when the page loads. If you haven’t defined any datasets yet, go and do that now. Click on Delta Sharing in the left half of your data explorer.

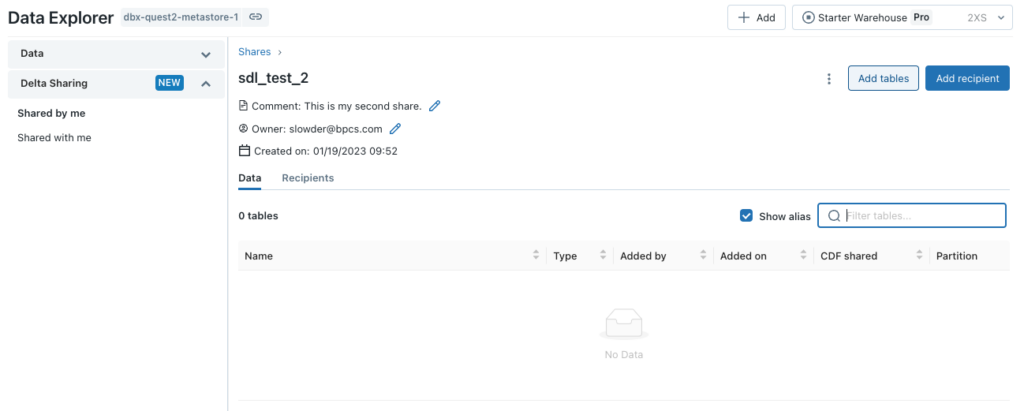
Once the page loads, you’ll see any shares you have defined previously or any share you have access to in the current workspace. Click Share Data on this next screen to define your new share.

Next, you’ll be prompted for a share name and comment. Share names cannot contain symbols or spaces. After you’ve entered your share name, click create.

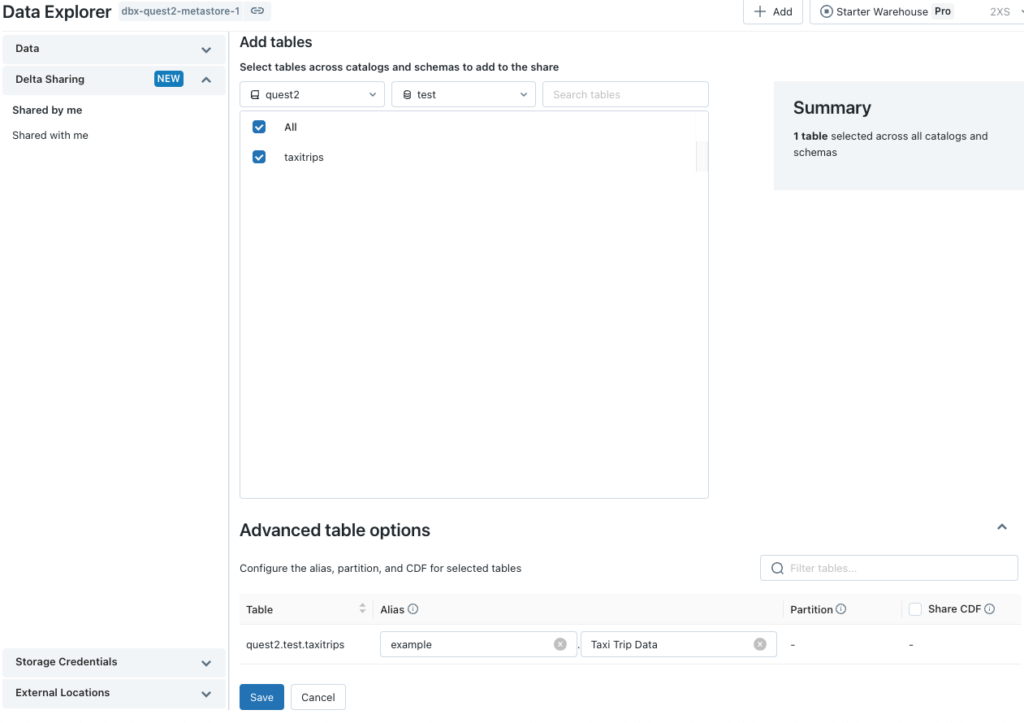
We can add any table already defined in our Unity Catalog. Click Add tables to select the tables you wish to share.

You can filter your table list to a specific database and schema. There’s also a free-form text box to help you find what you’re looking for. In my case, I’m going to share the NYC taxi data. If you open the Advanced table options section, you can also define an alias for your schema or table if you need a more human-readable name.
You can also limit the shared rows by adding a column filter. (Think column = ‘value’). It’s also possible to enable Change Data Feed, allowing consumers to query the data by version. If the data you’re sharing gets batch updates, you can allow users to see each batch’s update. This can be useful for feeds like the US unemployment rate, with a monthly release cycle.
Once you have selected your options, hit save to add your tables to the share.

When you return to the share page, click Add recipient to continue. If this is your first recipient, click Create new recipient to continue. Otherwise, you can click on an existing recipient to add them to this share.

On the next screen, you need to identify the recipient. This isn’t an email address or login; this is just an identifier that will remind you who this recipient is. It can be a Company name, user name, or anything. Again, no symbols or spaces are allowed.
If the user is going to access your data through another instance of Databricks, and that workspace is attached to a Unity catalog, you can request their metastore identifier. They can get their identifier by running the following query from their instance.
SELECT CURRENT_METASTORE()This will return an identifier in the format <cloud>:<region>:<GUID>. You can paste that into the Sharing identifier box. Finally, you can add a description for the recipient to help you identify this recipient in the future. Once you’ve entered all your information, click Create and add recipient.

When you return to the Add recipient screen, click Add to continue. You’ll then get a link to download the share file you’ll give to the recipient to access your data.

You can give this link to your recipient and follow it yourself to get the share file. When you follow the link, you land on a page that looks like this:

When you click Download Credential File, your browser will download the share file.
Once the consumer downloads that file, all the code from the previous blog entry works. They reference this new share file instead.

Conclusion
Creating Delta Shares in Databricks is pretty straightforward, As long as you already have Unity Catalog set up. As usual, if you have any questions, please let me know.